


Introduction
Have you ever read your horoscope in the newspaper or seen it on television? Well, I'm not sure about other countries, but in my country of India, people still read their horoscopes.
And this is where I got the idea for this tutorial. It might sound a bit old-fashioned, but the main focus here is not on the horoscope itself – it's just the vehicle for our learning.
In this article, we're going to scrape a website called Horoscope.com using Beautiful Soup and then create our own API using Flask. This API, if deployed on a public server, can then be used by other developers who would wish to create a website to show their horoscope or an app for the same.
How to Set Up the Project
First of all, we're going to create a virtual environment within which we'll install all the required dependencies.
Python now ships with the pre-installed venv library. So, to create a virtual environment, you can use the below command:
$ python -m venv env
To activate the virtual environment named env, use the command:
- On Windows:
env\Scripts\activate.bat
- On Linux and MacOS:
source env/bin/activate
To deactivate the environment (not required at this stage):
deactivate
Now we're ready to install the dependencies. The modules and libraries we are going to use in this project are:
- requests: Requests allow you to send HTTP/1.1 requests extremely easily. The module doesn't come pre-installed with Python, so we need to install it using the command:
$ pip install requests
- bs4: Beautiful Soup(bs4) is a Python library for pulling data out of HTML and XML files. The module doesn't come pre-installed with Python, so we need to install it using the command:
$ pip install bs4
- Flask: Flask is a simple, easy-to-use microframework for Python that can help build scalable and secure web applications. The module doesn't come pre-installed with Python, so we need to install it using the command:
$ pip install flask
- Flask-RESTX: Flask-RESTX lets you create APIs with Swagger Documentation. The module doesn't come pre-installed with Python, so we need to install it using the command:
$ pip install flask-restx
We'll also use environment variables in this project. So, we are going to install another module called python-decouple to handle this:
pip install python-decouple
To learn more about environment variables in Python, you can check out this article.
Project Workflow
The basic workflow of the project will be like this:
- The horoscope data will be scraped from Horoscope.com.
- The data will then be used by our Flask server to send JSON responses to the user.
How to Set Up a Flask Project
The first thing we're going to do is to create a Flask project. If you check the official documentation of Flask, you'll find a minimal application there.
But, we're not going to follow that. We are going to write an application that is more extensible and has a good base structure. If you wish, you can follow this guide to get started with Flask.
Our application will exist within a package called core. To convert a usual directory to a Python package, we just need to include an __init__.py file. So, let's create our core package first.
$ mkdir core
After that, let's create the __init__.py file inside the core directory:
$ cd core
$ touch __init__.py
$ cd ..
In the root directory of the project, create a file called config.py. We'll store the configurations for the project in this file. Within the file, add the following content:
from decouple import config


class Config(object):
    SECRET_KEY = config('SECRET_KEY', default='guess-me')
    DEBUG = False
    TESTING = False
    CSRF_ENABLED = True


class ProductionConfig(Config):
    DEBUG = False
    MAIL_DEBUG = False


class StagingConfig(Config):
    DEVELOPMENT = True
    DEBUG = True


class DevelopmentConfig(Config):
    DEVELOPMENT = True
    DEBUG = True


class TestingConfig(Config):
    TESTING = True
In the above script, we have created a Config class and defined various attributes inside that. Also, we have created different child classes (as per different stages of development) that inherit the Config class.
Notice that we have the SECRET_KEY set to an environment variable named SECRET_KEY. Create a file named .env in the root directory and add the following content there:
APP_SETTINGS=config.DevelopmentConfig
SECRET_KEY=gufldksfjsdf
Apart fromSECRET_KEY,we haveAPP_SETTINGS that refers to one of the classes we created in the config.py file. We set it to the current stage of the project.
Now, we can add the following content in the __init__.py file:
from flask import Flask
from decouple import config
from flask_restx import Api

app = Flask(__name__)
app.config.from_object(config("APP_SETTINGS"))
api = Api(
    app,
    version='1.0',
    title='Horoscope API',
    description='Get horoscope data easily using the below APIs',
    license='MIT',
    contact='Ashutosh Krishna',
    contact_url='https://ashutoshkrris.tk',
    contact_email='contact@ashutoshkrris.tk',
    doc='/',
    prefix='/api/v1'
)
In the above Python script, we are first importing the Flask class from the Flask module that we have installed. Next, we're creating an object app of class Flask. We use the __name__ argument to indicate the app's module or package so that Flask knows where to find other files such as templates.
Next, we are setting the app configurations to the APP_SETTINGS according to the variable in the .env file.
Apart from that, we have created an object of the Apiclass. We need to pass various arguments to it. We can find the Swagger documentation on the / route. The /api/v1 will be prefixed on each API route.
For now, let's create a routes.py file in the core package and just add the following namespace:
from core import api
from flask import jsonify

ns = api.namespace('/', description='Horoscope APIs')
We need to import the routes in the __init__.py file:
from flask import Flask
from decouple import config
from flask_restx import Api

app = Flask(__name__)
app.config.from_object(config("APP_SETTINGS"))
api = Api(
    app,
    version='1.0',
    title='Horoscope API',
    description='Get horoscope data easily using the below APIs',
    license='MIT',
    contact='Ashutosh Krishna',
    contact_url='https://ashutoshkrris.tk',
    contact_email='contact@ashutoshkrris.tk',
    doc='/',
    prefix='/api/v1'
)

from core import routes            # Add this line
We're now just left with one file which will help us run the Flask server:
from core import app

if __name__ == '__main__':
    app.run()
Once you run this file using the python main.py command, you'll see a similar output:
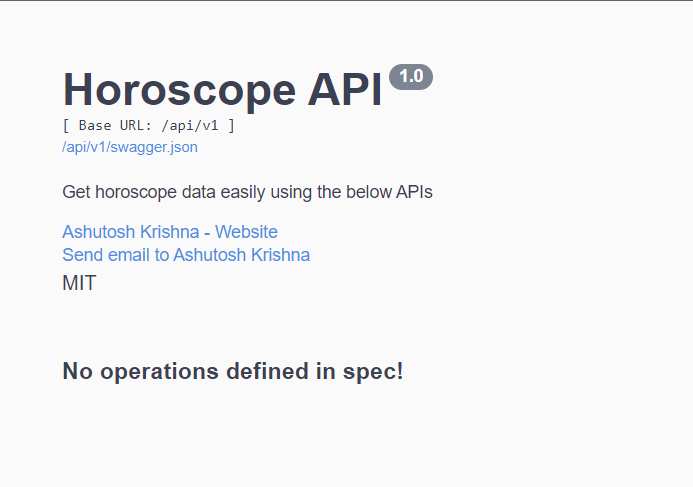
Now, we are ready to scrape the data from the Horoscope website.
How to Scrape the Data from Horoscope.com
If you open Horoscope.com and choose your zodiac sign, the horoscope data for your zodiac sign for today will be shown.
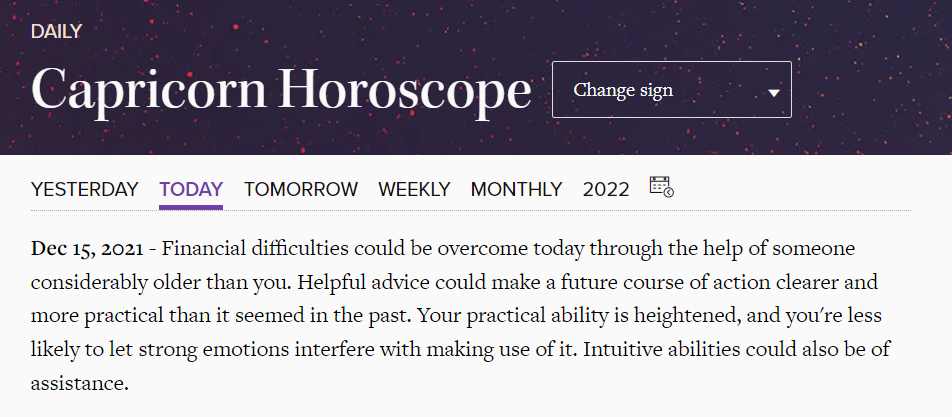
Source: Horoscope.com
In the above image, you can see you can view the horoscope for yesterday, tomorrow, weekly, monthly or even a custom date. We're going to use all of these.
But first, if you see the URL of the current page, it is something like: https://www.horoscope.com/us/horoscopes/general/horoscope-general-daily-today.aspx?sign=10 .
The URL has two variables, if you see clearly, sign and today. The value of variable sign will be assigned according to the zodiac sign. The variable today can be replaced with yesterday and tomorrow.
The dictionary below can help us with the zodiac signs:
ZODIAC_SIGNS = {
    "Aries": 1,
    "Taurus": 2,
    "Gemini": 3,
    "Cancer": 4,
    "Leo": 5,
    "Virgo": 6,
    "Libra": 7,
    "Scorpio": 8,
    "Sagittarius": 9,
    "Capricorn": 10,
    "Aquarius": 11,
    "Pisces": 12
}
This means that if your zodiac sign is Capricorn, the value of sign in the URL will be 10.
Next, if we wish to get the horoscope data for a custom date, the URL https://www.horoscope.com/us/horoscopes/general/horoscope-archive.aspx?sign=10&laDate=20211213 will help us.
It has the same sign variable, but it has another variable laDate which takes the date in YYYYMMDD format.
Now, we're ready to create different functions to fetch horoscope data. Create a utils.py file and follow along.
How to Get a Horoscope for the Day
import requests
from bs4 import BeautifulSoup


def get_horoscope_by_day(zodiac_sign: int, day: str):
    if not "-" in day:
        res = requests.get(f"https://www.horoscope.com/us/horoscopes/general/horoscope-general-daily-{day}.aspx?sign={zodiac_sign}")
    else:
        day = day.replace("-", "")
        res = requests.get(f"https://www.horoscope.com/us/horoscopes/general/horoscope-archive.aspx?sign={zodiac_sign}&laDate={day}")
    soup = BeautifulSoup(res.content, 'html.parser')
    data = soup.find('div', attrs={'class': 'main-horoscope'})
    return data.p.text
We have created our first function which accepts two arguments – an integer zodiac_sign and a string day. The day can either be today, tomorrow, yesterday or any custom date before today in the format YYYY-MM-DD.
If the day is not a custom date, it won't have the hyphen(-) symbol in it. So, we have put a condition for the same.
If there is no hyphen symbol, we make a GET request on https://www.horoscope.com/us/horoscopes/general/horoscope-general-daily-{*day*}.aspx?sign={*zodiac_sign*}. Else first, we change the date from YYYY-MM-DD to YYYYMMDD format.
Then we make a GET request on https://www.horoscope.com/us/horoscopes/general/horoscope-archive.aspx?sign={*zodiac_sign*}&laDate={*day*}.
After that, we pull the HTML data from the response content of the page using BeautifulSoup. Now we need to get the horoscope text from this HTML code. If you inspect the code of any of the webpage, you'll find this:

The horoscope text is contained in a div with the class main-horoscope. Thus we use the soup.find() function to extract the paragraph text string and return it.
How to Get a Horoscope for the Week
def get_horoscope_by_week(zodiac_sign: int):
    res = requests.get(f"https://www.horoscope.com/us/horoscopes/general/horoscope-general-weekly.aspx?sign={zodiac_sign}")
    soup = BeautifulSoup(res.content, 'html.parser')
    data = soup.find('div', attrs={'class': 'main-horoscope'})
    return data.p.text
The above function is quite similar to the previous one. We have just changed the URL to https://www.horoscope.com/us/horoscopes/general/horoscope-general-weekly.aspx?sign={*zodiac_sign*}.
How to Get a Horoscope for the Month
def get_horoscope_by_month(zodiac_sign: int):
    res = requests.get(f"https://www.horoscope.com/us/horoscopes/general/horoscope-general-monthly.aspx?sign={zodiac_sign}")
    soup = BeautifulSoup(res.content, 'html.parser')
    data = soup.find('div', attrs={'class': 'main-horoscope'})
    return data.p.text
This function is also similar to the other two except the URL which has now been changed to https://www.horoscope.com/us/horoscopes/general/horoscope-general-monthly.aspx?sign={*zodiac_sign*}.
How to Create API Routes
We'll be using Flask-RESTX to create our API routes. The API routes will look like these:
- For daily or custom dates:
/api/v1/get-horoscope/daily?day=today&sign=capricornorapi/v1/get-horoscope/daily?day=2022-12-14&sign=capricorn - For weekly:
api/v1/get-horoscope/weekly?sign=capricorn - For monthly:
api/v1/get-horoscope/monthly?sign=capricorn
We have two query parameters in the URLs: day and sign. The day parameter can take values like today, yesterday, or custom dates like 2022-12-14. The sign parameter will take the zodiac sign name which can be in uppercase or lowercase, it won't matter.
To parse the query parameters from the URL, Flask-RESTX has built-in support for request data validation using a library similar to argparsecalledreqparse. To add arguments in the URL, we'll use add_argument method of the RequestParser class.
parser = reqparse.RequestParser()
parser.add_argument('sign', type=str, required=True)
The type parameter will take the type of parameter. The required=True makes the query parameter mandatory to be passed.
Now, we need another query parameter day. But this parameter will be used only in the daily horoscope URL.
Instead of rewriting arguments we can write a parent parser containing all the shared arguments and then extend the parser with copy().
parser_copy = parser.copy()
parser_copy.add_argument('day', type=str, required=True)
The parser_copy will not only contain day, but also sign. That is what we'll require for the daily horoscope.
The main building blocks provided by Flask-RESTX are resources. Resources are built on top of Flask pluggable views, giving you easy access to multiple HTTP methods just by defining methods on your resource.
Let's create the DailyHoroscopeAPI class that inherits the Resource class from flask_restx.
@ns.route('/get-horoscope/daily')
class DailyHoroscopeAPI(Resource):
    '''Shows daily horoscope of zodiac signs'''
    @ns.doc(parser=parser_copy)
    def get(self):
        args = parser_copy.parse_args()
        day = args.get('day')
        zodiac_sign = args.get('sign')
        try:
            zodiac_num = ZODIAC_SIGNS[zodiac_sign.capitalize()]
            if "-" in day:
                datetime.strptime(day, '%Y-%m-%d')
            horoscope_data = get_horoscope_by_day(zodiac_num, day)
            return jsonify(success=True, data=horoscope_data, status=200)
        except KeyError:
            raise NotFound('No such zodiac sign exists')
        except AttributeError:
            raise BadRequest(
                'Something went wrong, please check the URL and the arguments.')
        except ValueError:
            raise BadRequest('Please enter day in correct format: YYYY-MM-DD')
The @ns.route() decorator sets the API route. Inside the DailyHoroscopeAPI class, we have the get method that will handle the GET requests. The @ns.doc() decorator will help us add the query parameters on the URL.
To get the values of query parameters, we'll use the parse_args()method that will return us a dictionary like this:
{ "sign": "capricorn", "day": "2022-12-14" }
We can then get the values using the keys day and sign.
As defined in the beginning, we'll have a ZODIAC_SIGNS dictionary. We use a try-except block to handle the request. If the zodiac sign is not in the dictionary, a KeyError Exception is raised. In that case, we respond with a NotFounderror (Error 404).
Also, if the dayparameter has a hyphen in it, we try to match the date format with YYYY-MM-DD. If it's not in that format, we raise a BadRequest error (Error 400). If the day doesn't contain a hyphen, we directly call the get_horoscope_by_day() method with the sign and day arguments.
If some gibberish is passed as the parameter value, an AttributeError is raised. In that case, we raise a BadRequest error.
The other two routes are also quite similar to the above one. The difference is, we don't need a day parameter here. So, instead of using parser_copy, we'll use parser here.
@ns.route('/get-horoscope/weekly')
class WeeklyHoroscopeAPI(Resource):
    '''Shows weekly horoscope of zodiac signs'''
    @ns.doc(parser=parser)
    def get(self):
        args = parser.parse_args()
        zodiac_sign = args.get('sign')
        try:
            zodiac_num = ZODIAC_SIGNS[zodiac_sign.capitalize()]
            horoscope_data = get_horoscope_by_week(zodiac_num)
            return jsonify(success=True, data=horoscope_data, status=200)
        except KeyError:
            raise NotFound('No such zodiac sign exists')
        except AttributeError:
            raise BadRequest('Something went wrong, please check the URL and the arguments.')


@ns.route('/get-horoscope/monthly')
class MonthlyHoroscopeAPI(Resource):
    '''Shows monthly horoscope of zodiac signs'''
    @ns.doc(parser=parser)
    def get(self):
        args = parser.parse_args()
        zodiac_sign = args.get('sign')
        try:
            zodiac_num = ZODIAC_SIGNS[zodiac_sign.capitalize()]
            horoscope_data = get_horoscope_by_month(zodiac_num)
            return jsonify(success=True, data=horoscope_data, status=200)
        except KeyError:
            raise NotFound('No such zodiac sign exists')
        except AttributeError:
            raise BadRequest('Something went wrong, please check the URL and the arguments.')
Now our routes are done. To test the APIs, you can use the Swagger documentation available on the / route, or you can use Postman. Let's run the server and test it.
You can also deploy the project on a public server so that other developers can access and use the API too.
Wrapping up
In this tutorial, we learned how to scrape data from a website using requests and Beautiful Soup. Then we created an API using Flask and Flask-RESTX.
If you wish to learn how to interact with APIs using Python, check out this guide.
I hope you enjoyed it – and thanks for reading!
Code for the tutorial: %[github.com/ashutoshkrris/Horoscope-API]